Showing posts with label unity 3D. Show all posts

Sunday, March 31, 2019


Level Editor Demo Project:
    Hi I’m a tech artist who works heavily with Unity game engine and wanted to make a tool that anyone could make simple levels in. I have been working in the games Industry for over 5 years and have been inspired by many games and demos and thought to make one of my own. Since I have a tech art background I wanted to make a Tool that an artist or anyone could use to quickly build puzzle rooms and whole levels to play.
    The Demo’s Goal: A level editor that could build rooms quickly and set up logic for puzzles. The player has the ability to play test and iterate quickly on the level. The games with similar elements or visual styles are (The Legend of Zelda, Fez, Journey, Bomber Man 64, FF Tactics). I will get this working on unity Web Gl, maybe published to Itch.IO. I wanted the presentation to be similar to Oscar Stolberg’s quality of demos. Since they were always well received.

    So I set out to make a demo with those thoughts loosely in place in my mind. I did Pretty well I followed an A* tutorials on pathfinding because I did want a character to walk around my levels. I used the node from the grid of that tutorial to base the node of my level editor on. From there I added colliders to prefabs and set up raycasting to tags to get the info from the node I was ray casting to. After that I just set tags on the nodes to set up rules of updating the visuals.  


    After that I wanted to get pathfinding basics working with the editor so I could have a solid plan on what to clean up and better refactor my code. Since I had the basics from a tutorial updating it work was simple enough. Now I have code to clean and to update the Icons and User feedback of the editor tool.


    The next update will focus on updating the UI, user Experience, Code refactor, updating the visual feedback for the editor tool.

Tuesday, July 5, 2016

Unity Tile Editor 1.0

I made a tile editor for fun. Before the initial Oh God! Why would you want to make a tile editor for fun comments. Editors, procedural generation, and A.I. has always been a point of interest for me. This project seemed like a really good starting point. This post is going to go over the high level workings of the tool some info I learned along the way.

Before that, I cannot take full credit for the tool creation because I learned a lot of the core concepts of creating a tile editor from Lynda.com 2d tile editor course. Fun side note the course only went over building a tile editor for a 2D sprite game, getting the editor to work in 3D with prefabs was a whole other beast.


M.V.P. (minimum viable product)

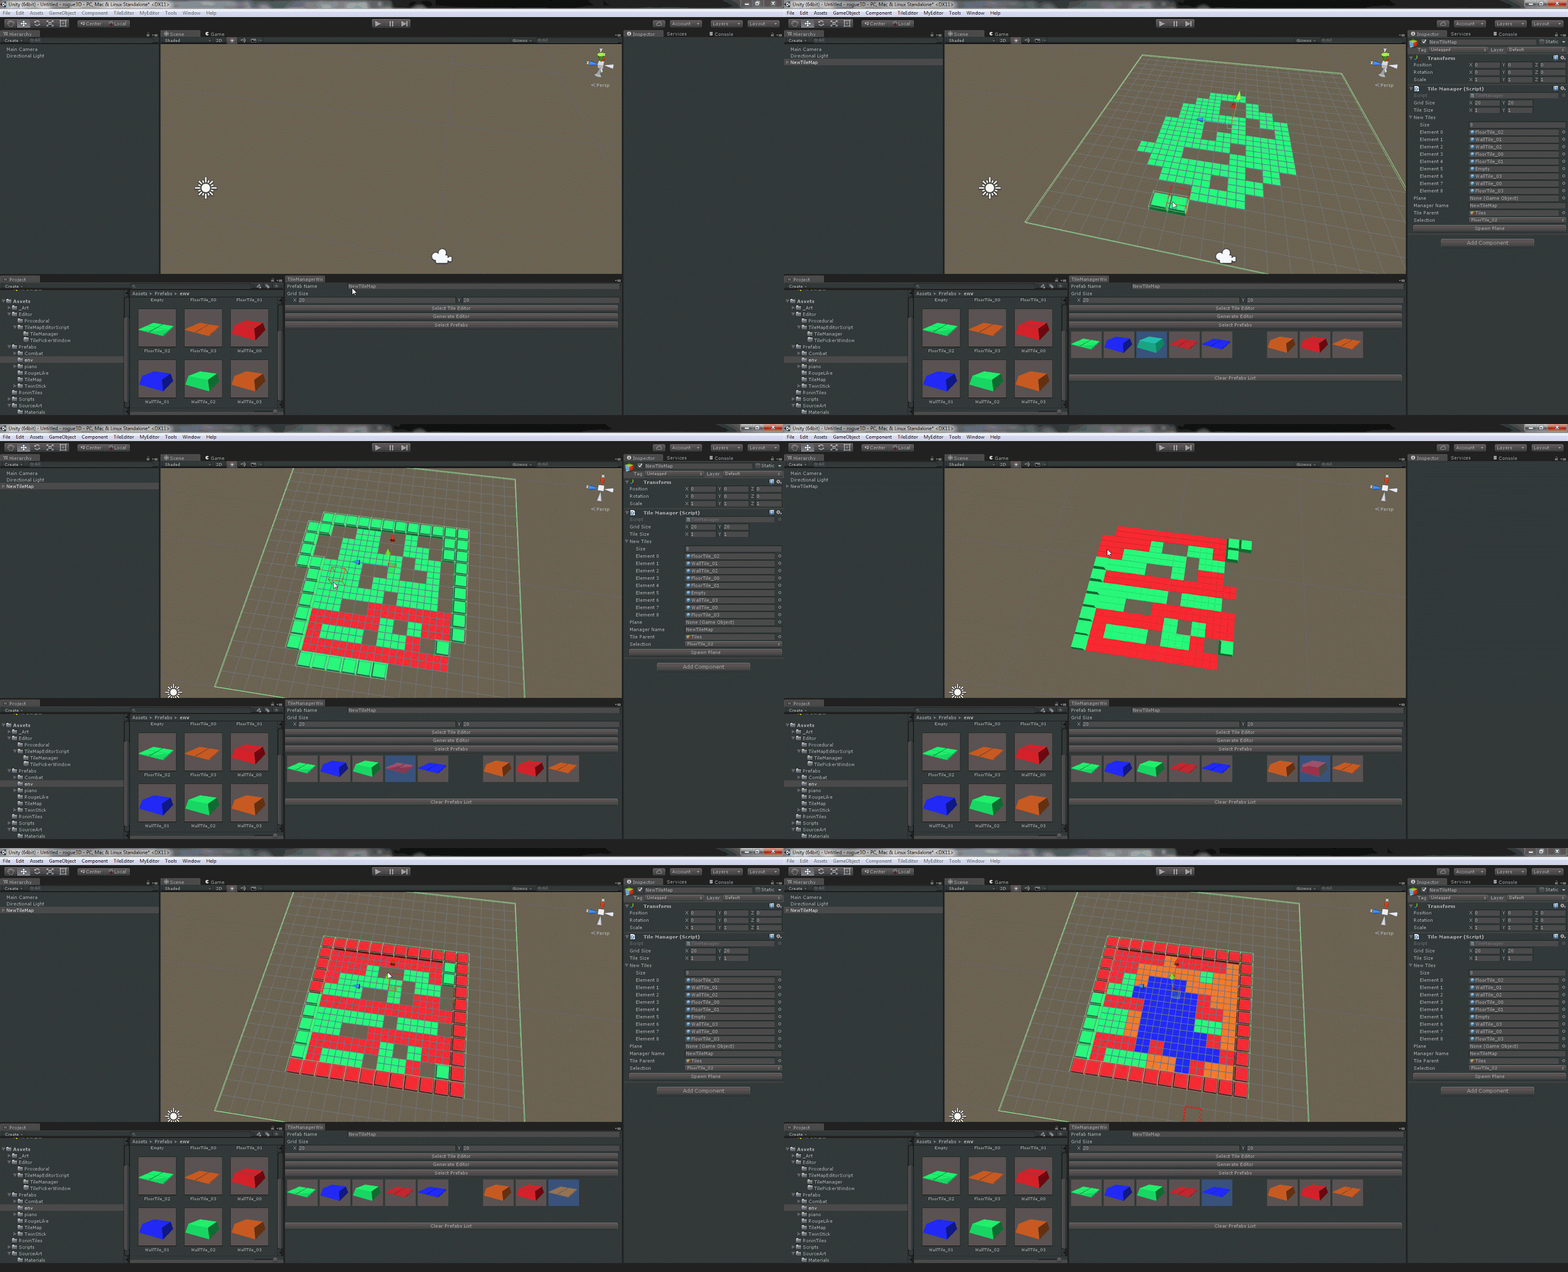
 The gif. above is the 1.0 version of the tile editor, It works! The user can save out prefabs of the new tile layout and load them back in to continue working on them. The user also has full control over what prefab they can use as a tile by simply selecting them and hitting the select prefabs button. From there they hold down shift to paint the tile they want. 


The Code

 Full disclosure I am not a programmer, nor have I spent extensiveness time with C#, though I'm happy to share what I found/learned.

The are four scripts that drive this whole thing.
  • Tile Manager: the code that drives the grid layout and size gizmos.
  • Tile Brush: renders the red cube gizmo that is used as a brush.
  • Tile Manager Editor: editor script for Tile Manager, it deals with all the ray-casting and in editor updating of gizmos.
  • Tile Manager Window: the script that handles generating and selecting tile maps & the brush selection UI with a new window.
Gizmos: are the wire frame shape primitives (circle, square, line, cube, etc... ) that are drawn in the scene view for debugging. I learned about OnDrawGizmosSelected() that actual draws the gizmos if you have the game object the script is attached to selected. The two script that utilizes it are Tile Manager & Tile brush, they are the only mono behavior script.

Raycasting In editor:
To get a clean Raycast from the scene the best method I found was,
Ray ray = HandleUtility.GUIPointToWorldRay(Event.current.mousePosition);
HandleUtility.GUIPointToWorldRay actually gets the 2D GUI position to cast a ray into world space. Camera.current also worked most of the time but all the posts online I found said using the HandleUtility was a better way to go.

I had to execute raycasting in Tile Manager Editor script with the OnSceneGUI() Method to update the hit position of brush and the spawn point for the tiles.

AssetPreview.GetAssetPreview: this method what allowed me to get prefab thumbnail that are used in the project view to show up in my custom window.

T.L.D.R.

 Code: look up Gizmos,  HandleUtility.GUIPointToWorldRay, editor, OnSceneGUI(), & AssetPreview.GetAssetPreview if your going to make a tile editor it will help ;)

Conclusion

I had a lot of fun researching some of this and building out a tile editor. The tool still has a ways to go in terms of editing brush size, adding a real delete option, tile editing option (like rotate and offset), saving the tile to a text doc (xml or json) and other "fun" I want to have with it & tons of clean up.
Hope you enjoyed the read have a good one!